I was elbow-deep in terrain basing last Tuesday when I spotted Army Painter’s Speedpaint Markers. My first thought? Markers? For minis? But the more I looked at that ten-marker starter set—each one fat and satisfying, stuffed with rich acrylics—the more curious I got. No palette. No brush. No water cup getting murky by hour three. Just grab, click the cap, and paint. So I did something I don’t usually do: I cleared my desk, killed an evening, and painted a bunch of minis using nothing but these felt-tip markers. What I discovered surprised me.
TL;DR
10 acrylic markers (9 colors + 1 metallic) that paint smooth, dry fast, and need zero brush care.
Perfect for speed painting, terrain, basing, and anyone who hates cleaning brushes.
No setup, no mess. Just uncap and paint—you’ll finish a full squad in one session.
The felt tip is firm but flexible; it handles detail work better than I expected.
Replacement tips included, and they swap in seconds. Longevity is real.
Who It’s For
If you’re a fast painter who’d rather spend time on models than palette maintenance, these are a dream. Terrain builders will love the marker tip for rocky bases, weathering, and dry-brushing textures onto big chunks. Diorama makers? Fantastic for blocking out colors and adding quick details on buildings or scatter terrain. Even seasoned painters thinking about a travel kit or a “grab and go” painting station will find these useful. New hobbyists especially: these remove the intimidation factor of mixing paints and managing an 80-brush collection.
What Makes These Speedpaint Markers Interesting?
The Army Painter team took their wildly popular Speedpaint liquid line—those thinned-down acrylics that flow into crevices and build color in layers—and squeezed them into a felt-tip marker format. That’s the genius. You’re not getting watered-down craft markers here. These are the same pigment-rich acrylics you’d get from a bottle, but without the brush-and-palette dance.
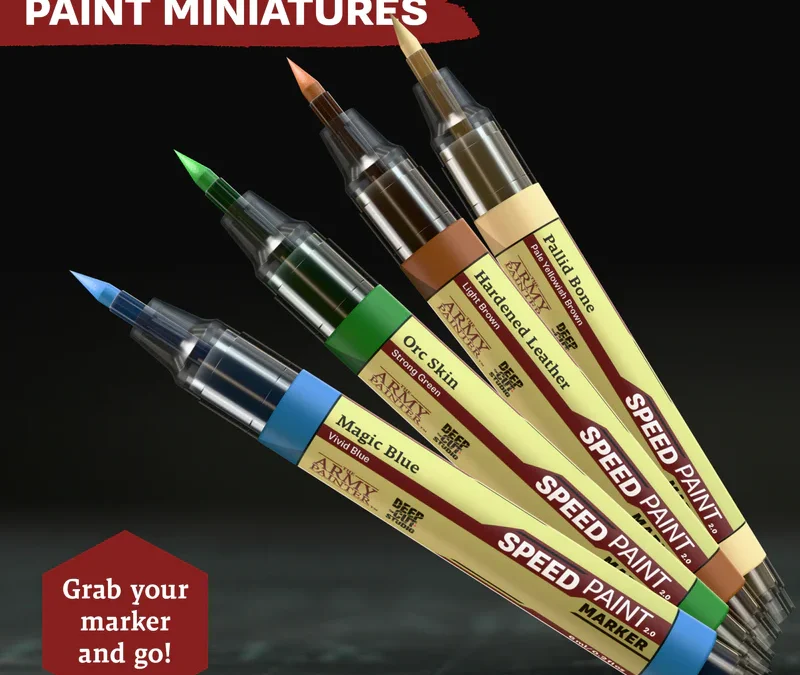
The starter set includes nine core colors (Magic Blue, Fire Giant Orange, Hardened Leather, Grim Black, Pallid Bone, Orc Skin, Zealot Yellow, Gravelord Grey, Blood Red) plus Polished Silver—a metallic that catches light beautifully on armor and weapons. The names alone tell you they’re built for tabletop gaming: that warm, burnt orange is perfect for sci-fi rust or fantasy leather; the Orc Skin practically begs to be slathered across goblin hordes or rusty Aeon mechs.
What grabbed me most? The tip design. It’s not your standard highlighter felt. It’s engineered to be firm enough for controlled lines but flexible enough to fill in larger areas. Switch from painting a rifle stock to lining an eye socket without changing tools.
How Does It Work in Practice?
Here’s the real test: I grabbed a handful of random minis from my backlog—some sci-fi soldiers, a goblin conversion, and a chunk of rocky basing terrain—and went to town.
Setup time: 30 seconds. Unbox the markers. Don’t even need water. That alone is worth the price of entry.
Uncapping and priming: The markers have a satisfying click when you cap and uncap them. They don’t dry out immediately like I feared. I left the Grim Black uncapped for five minutes while I assembled my test pieces, and it still flowed smoothly.
First strokes: The magic blue went down in a single, confident stroke on a sci-fi soldier’s bodysuit. The pigment is opaque enough that you get solid coverage without two or three coats. On white primer, one pass and I was done. Over black primer (my usual base), one pass gave a rich, saturated color; a second layer made it pop.
Blending and layering: This is where the liquid Speedpaint heritage shows. The markers stay wet long enough to let you layer colors and blend them slightly with a clean brush (yes, you might want one brush for blending—but just one). I painted a goblin’s face in Hardened Leather, then added Zealot Yellow to the cheeks. The paint didn’t immediately set, so I had a minute to smooth the transition. That’s not something you get with most craft markers.
Coverage on terrain: I tested the Gravelord Grey on a chunk of cork and foam basing. The marker tip went across bare surface smoothly, and a drybrush follow-up with white picked out the texture beautifully. It’s not as fast as dry brushing alone, but the basecoat went down in seconds.
Drying time: About 5–10 minutes to full set, depending on how thick you laid it. That’s faster than traditional acrylics and slower than spray primers, which feels just right for workmanlike painting.
The metallic: Polished Silver is a gem. It has genuine shimmer—not just reflectivity, but actual mica or similar in the formula. I ran it across a sword blade and it glinted like real metal. One pass over black primer, and it looks battle-worn. Two passes over white, and it’s pristine polished steel. Didn’t separate or behave like typical bottled metallics, which was a relief.
What Are the Pros and Cons?
Pros
Speed: You’re not joking when you say “Speedpaint.” Seriously, no brush prep, no palette mixing, no waiting around. Pick up a marker and paint. I knocked out three squad members in the time I’d usually spend setting up my palette.
Minimal cleanup: Rinse the marker cap if paint gets on it. That’s it. No brush soaking, no paint-hardened bristles, no accidental water spills.
Portability: Throw these in a small box and you’ve got a painting kit for travel, a campaign event, or painting at a friend’s place. They’re lighter than a brush roll.
Pigment richness: These aren’t diluted. The color saturation is genuinely impressive. Even muted tones like Hardened Leather have depth and character.
Replacement tips: The box includes ten replacement tips. Felt wears down, sure, but you get backup right out of the gate. Tip swaps take about ten seconds and use a clever quick-release design.
No toxic odor: You get the faint, pleasant acrylic smell—nothing like solvent-based markers. Great for painting in a shared space (dorm, family room, workshop) without complaints.
Cons
Limited color range: Ten colors is a solid starter, but you’re going to feel the ceiling fast. If you’re a painter who mixes custom colors, this’ll frustrate you. You can layer to create new tones, but it’s not the same as mixing.
No erasing (obviously): Mistakes are permanent. You can paint over them if the color is opaque enough, but it’s not like colored pencils where you can erase. Precision and confidence matter here.
Felt tip wears: I notice the edges getting slightly fuzzy after heavy use. It doesn’t ruin detail work, but a sharp tip is sharper. Not a dealbreaker, given the replacement tips, but worth knowing.
Not ideal for very fine detail: The markers nail “nice detail,” but if you’re painting eyeballs at 28mm scale with a brush-tip marker, you’re limited by physics. A 0.1mm technical pen this is not.
Long-term color consistency: Acrylic markers can vary slightly depending on how long they sit. I don’t have long-term data, but it’s a fair concern for project consistency over months.
Any Cool Techniques or Tricks?
Drybrush Layering
Here’s what surprised me: these markers layer beautifully with traditional drybrushing. Base coat with the marker (one stroke, done), then hit it with a highlight drybrush using a regular brush and acrylics. The marker paint accepts the dry brush without beading or resisting. Perfect for adding weathered texture to armor or metallic wear on bases.
Double-Tipping for Gradients
Slightly wetter than usual, layer two colors side-by-side—say, Orc Skin and Zealot Yellow—then use a clean, barely damp brush to feather the edge. You get a gradient in seconds. Works on terrain especially.
Marker + Wash Combo
Paint a wide area with the marker (like a basecoat on rocky terrain), then apply a traditional liquid wash over top. The markers don’t resist washes the way some hard-set primers do. The wash settles into crevices while the marker color provides the solid base. Excellent for getting depth on diorama elements.
Stippling for Texture
Use the marker tip with a light, dabbing motion (instead of brushing) to create stippled texture on rocky bases, stone walls, or weathered surfaces. Feels less “painted” and more natural.
Would I Recommend Them for Skirmish Gaming?
Absolutely. The Speedpaint Marker starter set is perfect for skirmish painters who prioritize finished armies over museum-quality display pieces. Whether you’re prepping a Gangfight gang, building a band for Aeon, or creating terrain for Chronicle-style campaigns, these markers will shave weeks off your painting time.
They shine brightest when you’re painting groups of similar minis (whole squads, terrain piles, horde bases) or when speed matters more than micropainting. But they’re also genuinely fun—there’s something liberating about uncapping a marker, avoiding all setup, and just painting. It feels like play instead of work.
The only real caveat: if your skirmish armies demand custom paint mixes or highly varied color palettes, you’ll quickly want to supplement these with regular acrylics. But as a core toolkit? They’re legitimately excellent.
Mini-Tutorial: Quick Skirmish Base Using Speedpaint Markers
Perfect for 25–30mm bases with rocky or sandy scatter terrain.
You’ll need:
- Speedpaint Markers (Gravelord Grey, Zealot Yellow, Blood Red, Grim Black)
- A cork or foam base
- One cheap round brush for optional blending
- Varnish (optional, to protect the finish)
Steps:
- Lay down the grey. Use the Gravelord Grey marker to cover most of the base, letting the felt tip follow the texture of the cork or foam. One or two passes depending on opacity you want.
- Add yellow/tan accents. In small patches—representing dust, sand, or lichen—touch the Zealot Yellow marker to exposed areas. Don’t cover everything; let the grey show through.
- Darken shadows. With Grim Black, trace the deepest crevices and shadows. Keep it controlled; you want contrast, not a muddy base.
- Optional: Red oxide weathering. For a sci-fi or post-apocalyptic feel, use Blood Red in tiny dots and streaks to suggest rust or decay. One or two tiny marks go a long way.
- Let it set. Wait 10 minutes for full cure, then glue your mini to the base.
- Optional: Seal it. A quick spray of matte or satin varnish locks in the finish and gives it durability for gaming table movement.
Result: A finished, textured base in 15 minutes with zero brush cleanup.
Comparison: Speedpaint Markers vs. Other Fast-Paint Methods
| Method | Setup Time | Color Range | Detail Work | Cleanup | Best For |
|---|---|---|---|---|---|
| Speedpaint Markers | ~30 sec | 10 colors (expandable) | Medium | Minimal (just cap/rinse) | Speed painting, terrain, travel kits |
| Speedpaint Liquid | 2–3 min | 40+ colors | Excellent | Brush care required | Experienced painters, skirmish armies |
| Spray Primer + Washes | 1–2 min | Limited (base only) | Poor | None (spray) | Base coating large groups |
| Traditional Acrylics + Brush | 5–10 min | Unlimited (mix) | Excellent | Significant | Detail work, display pieces |
| Contrast/Base Paint | 2–3 min | 20+ colors | Fair | Moderate | Quick table-ready armies |
FAQs
Q: Do these work over black primer? A: Yes! They’re opaque enough for single-coat coverage over black. Magic Blue, Fire Giant Orange, and Zealot Yellow shine especially well over dark bases.
Q: Can I mix marker colors by layering? A: Absolutely. Layer Hardened Leather over Grim Black to get a richer brown. Layer Zealot Yellow over Fire Giant Orange for a golden tone. You won’t get true color mixing, but you can create convincing blends.
Q: Do the markers dry out quickly? A: No. They stay usable for weeks if you cap them properly. I’ve had markers uncapped for several minutes with no issues. That said, proper capping does matter long-term.
Q: Are replacement tips easy to swap? A: Very. There’s a small release button on the marker body. Press it, pull the old tip straight out, slide a new one in, and click. Takes about 10 seconds.
Q: What happens if I paint over a mistake? A: You can paint over marker strokes with a second coat if the new color is opaque. Metallic Polished Silver over Grim Black, for instance, covers easily. Lighter colors over darker ones may need two passes.
Q: Can I use these on non-miniature surfaces? A: Sure! These work on wood, foam, cork, resin, and plastic. Terrain-building communities could absolutely use these for scatter terrain, dioramas, or landscape bases.
Q: Do these markers work with traditional acrylic paint on top? A: Yes, they layer beautifully with traditional acrylics. The marker paint doesn’t resist washes or drybrushing.
Q: Will these work on already-primed minis? A: Yes. They adhere to primer and other acrylic surfaces. No primer coat is needed if you’re just adding details or colors to an existing model.
Q: Are they safe for all ages? A: Army Painter notes these are acrylic and water-based—much safer than solvent markers. That said, they’re best used by ages 8+, though younger kids can use them under supervision.
Q: How much does a starter set cost? A: The Army Painter Speedpaint Marker Starter Set typically runs around $30–40 USD, depending on retailer and current promotions.
Glossary: Hobby Painting Terms
Acrylic Paint: Water-based paint that dries quickly and is easy to clean up. Standard for tabletop miniatures.
Basecoat: The first color layer applied to a primed model, usually a solid, opaque color.
Drybrush / Drybrushing: A technique where you load a brush with paint, wipe away most of it, then drag it across raised surfaces to highlight texture. Creates weathered, worn effects.
Felt-Tip Marker: A marker with a porous felt applicator (versus ballpoint or gel). Allows fluid paint application and blending.
Metallic Paint: Paint containing mica, shimmer pigments, or metal flake for a shiny, reflective finish. Popular for weapons, armor, and accents.
Opacity: How solid or transparent a paint is. High opacity = solid coverage in one coat. Low opacity = transparent, requiring multiple layers.
Primer: A preparatory coating (spray or brush) applied to bare plastic, metal, or resin to improve paint adhesion and provide a color base.
Pigment: The colored powder suspended in paint that gives it its color. Higher pigment density = richer, more saturated colors.
Wash: A thin, watered-down paint (or specialized wash product) that flows into crevices and shadows, adding depth and definition.
Wet Palette: A palette (often homemade with paper towels and a ceramic tile) that keeps paint moist and usable for hours. Speeds up blending and layering.
Author & E-E-A-T
Tim Kline is a miniature painter, hobbyist terrain builder, and co-creator behind SkirmishGames.com, where he’s been reviewing and testing tabletop gaming tools and techniques for decades. He specializes in speed-painting methods, skirmish-scale dioramas, and helping new painters find their confidence with acrylics and brushes—and, apparently, markers too.
Last Updated: October 2025
Updates:
- Initial publication with full product review and hands-on testing
- Added mini-tutorial for skirmish base creation